Whether you hire a professional or do it yourself, painting your home can sometimes be challenging, but is almost always disruptive and chaotic. Here are some things you can do to make the process easier.
If you intend to do this yourself and not hire professionals, you'll require lots of assistance. There are numerous tasks included in painting the interior of your home. You’ll need to move furniture, prepare the walls, cover the floors, gather materials, various prep activities, cleaning, and don’t forget.. your helpers will need refreshment! It could take a 5 man crew as much as 10 days to completely paint a two-story home of approximately 2000 square feet. Enlist as many helpers as possible, as they may not all be available every day. Coordinate a coverage schedule so you can ensure you have plenty of help for the duration for the project. Plan ahead so your helpers can manage their personal schedules as well. They’ll appreciate your attention to their details.
The Cutters. The helper who you know will meticulously pay attention to every detail, with a steady hand while painting would be the best individual to manage “cutting in.” This is painting a straight edge, like along where the ceiling and walls meet, without painting the ceiling. Have them demonstrate their skill and ensure you have the right person for the job. A wavy line anywhere will stick out to you every time you enter the room. Also, establish more than one cutter. It’s a stressful job and can actually become painful for hands and arms after a while, so it’s good to switch out occasionally. Masking will make the job a bit easier, but if you find someone who can do it freehand, you’re golden.
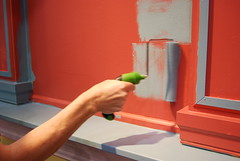
The Trimmers. Assign some to do the trim enamel on baseboards, doors and window frames. These also require skillful focus.
The Coordinator. This person may be your MVP. They will ensure the needs of the workers are met. Providing refreshment in the form of beverages and sandwiches, make those store runs for last minute items, arrange for lunch (or even cook) and / or dinner, make phone calls, wash out brushes, etc. When none of that is required, they can grab a roller and pitch in!
The Rollers. You should in fact only need a few of these, as they can cover a large space fairly swiftly. They’ll roll paint on the walls speedy quick.
The Caulkers. Caulking and hole patching (spackling) needs to be done before any painting is begun, allowing for drying and sanding (if required) time. It is an important job, but needs to be timed well..
TIP: Launder the clothes and shoes (unless you covered them) worn during the job individually from other clothes. Clean your tools as well as the respirator, throwing out the filters, as well as the sanding sponges, followed by a shower to clean off all painting grime.

If your residence was constructed prior to 1978, you may have lead-based paint. In 1978, the federal government banned consumer uses of lead paint, yet some states prohibited it even earlier. Lead from paint, including lead-contaminated dust, is one of the most typical root causes of lead poisoning.
Any person who is paid to carry out work that involves lead-based paint in houses, child-care centers and pre-schools developed prior to 1978 must be certified to handle the challenge. This might consist of, yet is not restricted to, general contractors, household rental property owners, painters and special profession specialists (plumbers, carpenters, and electrical experts).
There are generally 3 categories of paint which expectant ladies might be subjected to: latex, oil, as well as enamel. The level of toxicity while pregnant is difficult to predict since there are presently no methods of determining real exposure levels. The probability of paint toxicity depends on the chemicals and solvents discovered in the paint, together with the level of exposure.
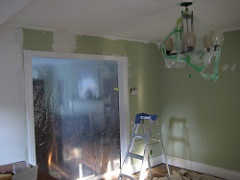
Need to Finish Quickly? Here's how to get started in a nutshell. After you've gathered your materials, get ready by taking all the furniture out of the room. Now you have room to easily clean the walls and also fill in any type of holes with spackle. Make sure to lay ground cloth or old sheets on the floor to protect the flooring from paint. When you start to paint, begin with a layer of primer. As soon as that has dried, you can begin painting with your color. Use little brushes to paint edges and big rollers to cover the rest.
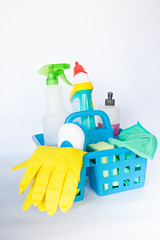
A clean, consistent surface area will certainly guarantee you a smooth, professional-looking outcome. Dark smudges can bleed through a layer of paint, and oil or various other materials on the wall surface can alter the consistency of the paint being used. Clean all walls to be painted with a solution of water as well as moderate cleaning agent. For difficult spots, like kitchen grease or soot smudges, specialists rely upon trisodium phosphate. Blended with bleach, trisodium phosphate could additionally get rid of mildew and also mold stains. No matter what you clean with, be sure to rinse the walls thoroughly when you're finished and also leave them plenty of time to dry before you start painting. Painting experts could also utilize fans to speed up the drying process.
Those are the basic steps. A more detailed step-by-step accounting follows to provide more precise direction to achieving professional-grade success!

Interior painting is a fantastic do-it-yourself task that could refurbish a room quickly, yet there are potential challenges to working on your own. Amateur painting could be simple to detect because, unlike professional jobs, they leave telltale signs of paint spatter, uneven color or missed areas behind. Here are seven steps you must follow prior to dipping your roller that will make sure you paint like a pro.
While this all might seem a lot of work, and it is, but you'll find the process very satisfying as you'll end up with a beautifully renovated home with a brand new look in the colors you chose to reflect your unique personality. Still, if it is too much, hire a reliable professional contractor to do the work!
---------------------------------------------------
ABOUT FANTASTIC FINISHES PAINT CO.
Our contractors are fully bonded and insured with
the expertise to perform whatever task you may
require, efficiently and with customer satisfaction
as their first priority.
Contact us today for a free estimate! (972) 672-2512
Web Design, Hosting, and Online Marketing Provided By 2Surge Marketing