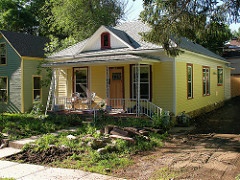
Painting a home's exterior does much more than simply improve its appearance. A correctly completed paint project will safeguard the home by establishing a preventative barrier to protect from wind and water damage, as well as other threats offered by weather. Considering the investment of time and money associated with this home enhancement endeavor, it goes without saying that it’s very important you ensure the job is done properly, with the best, most efficient tools and materials available on the market. This will lengthen the interval until your home needs to be painted once more. Although the work can take some time to complete, if done correctly, it can bring years of satisfaction to the homeowner. Half the battle is knowing how to proceed. To that end, the following will provide guidance and help you get it done. If it seems too much though, check into hiring a professional and get a free estimate to see how your costs will compare. When painting the exterior of your home, if it’s in the budget, go with a professional!
To ensure ideal protection, get rid of dirt and particle buildup from the surfaces to be painted using a pressure washer.
TIP: Proceed from top to bottom in smooth, controlled strokes, overlapping each stroke by about 8 inches.
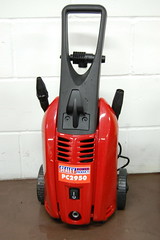
A good scrubbing should be performed on all outdoor surfaces you intend to paint. It eliminates any debris and broken-down paint residues that will prevent fresh coats of paint from adhering well, and also removes mildew that may grow on paint in all climates except those that are the most arid. The majority of painting professionals will clean with a pressure washer, but in the hands of a person not used to working with a power sprayer, these can shatter glass, gouge wood, and force water behind exterior siding and trim. Using a hose, a pump sprayer, and a brush to scrub with is slower, however also safer, and gets the job done just as well, if not better.
Before anyone starts spraying or scrubbing anything, secure nearby plants by misting their leaves and saturating their beds with water, and when possible, pulling them far from the house, and also shrouding them in a fabric ground cloth. (Plants will actually cook under plastic.) Put down ground cloth along the base of the walls to accumulate any falling paint debris. Wet down surfaces before scrubbing, then use a gallon of water mixed with 1 cup of chlorine bleach as well as 1 cup of either a concentrated, phosphate-free cleaner, like a trisodium phosphate (TSP) replacement, or Jomax House Cleaner. Addressing sections, from the bottom to the top, will prevent streaking. Make sure to immediately rinse well, before it has a chance to dry. Wood trim and siding will be ready to paint after a day or two without rain.
With loose paint eliminated, step away and see how your surface looks. If a lot of the paint seems to be in good shape and it's not too bumpy, the area can be smoothed out with 50- or 80-grit sandpaper.
Once you’ve sanded any areas requiring smoothing, it's time to fill in any minor fissures and dents, clean and replace any rotted areas, installing new materials for any areas too far gone for a simple sanding. (Replacing large segments of damaged siding or trim will likely call for an actual carpenter.) Small holes and dents can be patched with Ready Patch. It dries fast, smooth and flexible. There is a two-step epoxy designed to address deeper cracks and smaller spots that have rotted out. Previously used polyester auto-body fillers actually cure too hard for these repairs. They may look good to begin with, but will eventually peel. Any cracks you intend to caulk, wait until primer has been applied. It will protect wood when the caulk eventually fails, which it always will.
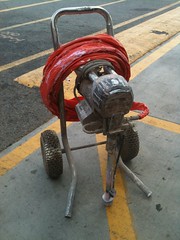
Decide how you will apply the paint. The majority of professionals will make use of paint sprayers since they allow for quick application, however without the expertise required to effectively utilize a power sprayer, drips, coats that are uneven and/or too thin, and even misty over spray may result, coating areas you had no intention of painting. If your professional uses a sprayer, ensure that peripheral areas are meticulously protected. Masking should be applied to anything at risk, like shrubbery, windows, walkways, roofs, gutters, cars… anything that might catch unintentional paint spray. After you’ve chosen a brand of paint, the professionals advise not adding anything like mildewcides, but will recommend adding conditioners like Floetrol (for latex paints) or Penetrol (for oil based paints) that will hinder drying so that brush and lap marks won’t be evident when painting in hot weather, as well as make the paint easier to spray.
Although the paints used for both exterior and interior painting share many qualities, they are actually formulated quite differently. The binding agents and additives in exterior paint are developed specifically to withstand weather conditions well, a characteristic that is not shared with interior paint.
Consider what materials are used on your home’s exterior and choose the appropriate paint. A standard outdoor paint can be used for painting flat surface areas like siding or wood, but textured areas like stucco or brick should be painted with elastomeric paint. It will stretch, bridging small crevices or fissures, painting smoothly over your textured surfaces.

Climate is one more element to consider. Sunshine, wind, rainfall and salty air can quickly degrade external paint.
Even though it may seem that using top quality products and hiring a professional is making your project more expensive than you expected, you’ll find your justification in the final product. The additional expense will result in a top quality, long lived paint job you’ll be more than satisfied with. Less expensive, lower quality paints will probably need repainting in a much shorter time frame and you’ll have to go through this process all over again, even sooner if it wasn’t applied correctly the first time.
Making a decision which type of paint to utilize has actually become simpler since acrylic latexes have pressed oil-based paints virtually to extinction. They perform much better, as oils tend to harden with age, preventing the painted surface from breathing without blistering. Acrylics don’t mildew as easily and emit less VOCs, complying with air-quality regulations. They also can be applied effectively over oil or water based primers. The areas where oil based paints are best are those high traffic areas requiring good wear resistance and water resistance, like porch floors, cast-iron and steel railings, and wood steps.
Load exterior paint color into paint sprayer. Depending on the intensity of the color, use 1 or 2 layers of exterior paint to the whole house. Be sure to work your way from top to bottom in a smooth, controlled manner, overlapping each stroke by 8 inches.
TIP: When changing the exterior color from light to dark or dark to light, begin with a coat of primer to guarantee appropriate coverage. Primer is not essential when a fresh layer of the existing color is being applied.
Apply a second coat. When you have actually waited the advised quantity of time for the paint to completely dry, you might consider applying a second coat - if time and budget permits. A second coat will ensure even paint distribution and also offer more protection for your residence. It will certainly help the completed project to look better and last much longer. If you have selected a much more vibrant shade for your home, a second coat will typically be required to bring the color to life.
This is a basic description of what’s required for exterior painting. Even if you choose to go with a professional contractor, it’s well advised that you understand exactly what should happen and all the steps required to effectively paint your home so you can ensure best practices are observed.
---------------------------------------------------
ABOUT FANTASTIC FINISHES PAINT CO.
Our contractors are fully bonded and insured with
the expertise to perform whatever task you may
require, efficiently and with customer satisfaction
as their first priority.
Contact us today for a free estimate! (972) 672-2512
Web Design, Hosting, and Online Marketing Provided By 2Surge Marketing